


The jumper cables are always a big deal and are also known as booster cables or jump leads. They have a singular focus, and the there main role is power transfer from one vehicle to the other.
Plus, you can transfer power from an energy source with the same voltage to a battery that doesn’t have enough charge to start a vehicle engine.
One thing about automotive emergency gear such as jumper cables is that you won’t want them until you want them.
You will surely need jumper cables if you don’t have a manual transmission car that can start with a good push.
Having and handling jumper cables are different things. Let’s find out more about jumper cables by answering the question.
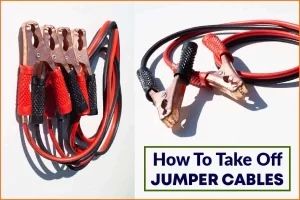
How to Take Off Jumper Cables
You can take off the jumper cables after successfully jump-starting your car. The good thing is the process is quite straightforward.
- After a successful connection, start the functioning car’s engine. Leave the car to idle for some minutes.
- You then start the car’s engine (dead) and leave it to run for some time.
- If it starts (dead car) without difficulties, you can carefully disconnect the negative clamp (it’s black) from the car’s battery. You then disconnect the negative clamp from the other car.
- You then remove the positive clamp (it’s red) from the battery on the car with the running battery and then from one with the previously dead battery.
How To Use Jumper Cables
Nothing is worse than walking back to your car after a long workday to find a dead battery. It might happen if you leave the interior lights on or your battery is in its end life.
Either way, you should know that car batteries don’t give trouble signs until it’s late or your car can’t start.
Therefore, whether you own a new or old car, you need to have jumper cables working, and you should know how to use them.
Ensure you have the right jumper cables. All sets will perfectly work when you need them. Mechanics suggest you choose jumper cables with 4 to 6 gauge and should be at least 6 meters (20 feet) long.
Extra-long cables are handy and make battery connections much easier if the two cars aren’t directly close to each other. Plus, consider jumpers with heavy clamps and thicker cables.
Handle your jumper cables properly when it comes to jumping your battery. Black and red clamps should not touch and ensure the cables stay apart when setting up – especially after connecting the clamps to the live battery.
If hot clamps touch, they could short out either car, causing sparks. Incorrectly using jumper cables can be quite dangerous and thus you have to follow some steps precisely.
Most jumpers come with labels or instruction cards that guide you on correctly connecting them. Let’s find out how you can safely use the jumper cables:
1. Closely Park The Vehicles
If you have a short jumper cable, the first step will be to park the car with a running battery next to the dead battery.
Here the need is to have the vehicles as close as possible so that the jumper cable can perfectly reach both batteries.
One thing you should avoid is letting the car touch anywhere. It might lead to a short circuit, which can damage onboard electronics.
Plus, short circuits can lead to dangerous sparks that can cause fire or explosion.
In addition, if you’re planning to buy jumper cables, you need to ensure they’re at least 20 feet long.
The extra length will be quite useful in an event where you can’t bring the car’s hoods so close, for example, in the parking lot.
2. Find The Batteries and Their Terminals
Locations of car batteries vary according to different car models. In most vehicle models, the battery is usually under the bonnet. That’s on either right or left of the car engine.
After finding the battery’s location, you have to access the terminals and identify their polarity (negative and positive). Identifying or distinguishing the terminal polarities is quite straightforward.
Look for the negative (-) and positive (+) labels on the case near the terminals. You can also use posts to differentiate the size; the negative terminal is usually smaller.
3. Ensure Your Jumper Cables are Ready
You have to handle the jumper cables carefully if you are learning how to start a car battery that’s down. Note that black and red clamps shouldn’t touch.
Be keener after connecting one pair to a working battery. It can lead to short circuits, which can cause expensive damage to any of the cars.
To reduce the risk, you should ensure the negative and positive clamps are apart at all times.
4. Safely and Correctly Connect The Jumper
You need to follow the steps to correctly and safely connect jumper cables.
- The first thing to do is connect the cable’s positive to the other positive terminal (dead battery). You then connect the red clamp to the working battery positive terminal.
- Next, you need to attach the negative cable clamp to the working battery and then to the unpainted metallic part of the dead battery vehicle.
Note that you shouldn’t attach it to a dead battery negative terminal. It can surely cause sparks that might lead to hydrogen gas leaks from the battery.
The chassis, alternator bracket, or unpainted engine bolt are the best places to attach your negative jumper cable. Newer car models have a grounding point someplace under the hood.
5. Start The Engine of Running Car
If you are sure that the jumper cable connection is perfect and correct, turn on the car engine with a live battery.
Leave the car idle for some minutes to gather enough electrical current to transfer to the dead battery.
6. Try Turning On Car with Dead Battery
After some minutes, you can start the car’s engine with a dead battery. If the engine delays firing up, you’ll have to try more times.
If it fires up, then congratulation, the jump-starting was successful. Please do not switch off the car immediately; let it run for minutes before disconnecting the jumper cables.
Please don’t turn off the engine for at least thirty minutes, but you can turn it off when you reach your destination.
7. Disconnect The Jumper Cables Carefully
To disconnect the jumper cable, you need to be quite careful. The best way to do it is to reverse how you did connect.
Start with the negative clamp on the dead vehicle and then from the donor vehicle battery. You then remove the positive clamp from the donor’s vehicle battery terminal.
The last step is removing the positive clamp from the previously dead car battery terminal.
Car Jump Safety Tips
First, you need to check the battery’s condition you want to jump-start. Do not jump start if the battery is leaking or has a crack.
It can lead to an explosion. If your battery is in this condition, it’s the best time to replace it. Plus, check the batteries terminals have corrosion wipe them clean.
It will help the batteries make a solid connection. However, to protect your hand, do the cleaning while wearing gloves.
When buying jumper cables, always go for high-quality ones, plus they should be within your budget. The cables should have at least 8-gauge wire and well-insulated lamps.
Ensure the cables don’t touch since it can lead to serious damage to the car computer and the charging system. Be extra cautious when working with batteries since they potentially produce explosive gases.
Always use corrosion-free cables and can safely and securely connect to the battery. Put on protective equipment and do not smoke or light a match while around the batteries.
If you are unsure of what you are doing, it’s better to call a mechanic or professional.
How To Position Cars When Jump Starting Your Battery
Do not worry when your car’s battery dies since you can jump-start it using a second car battery. Bring the working vehicle closer so that the hoods are some inches apart.
There should be some space between them. The jumper cables will connect the two vehicles perfectly by bringing the vehicles together. To get the best results to ensure the car batteries have similar voltages.
Confirming this is simple, look at the battery’s top for specifications. If the working car has a higher voltage, it can damage the other car’s battery. If this is the case, you should ask for help from another driver instead.
When To Disconnect The Jumper Cable
You can surely disconnect the jumper cable when all vehicles are running. Follow the guide in this article when removing the jumper cables.
Remove one clamp at a time and ensure you do it in the opposite order you did connect them. After disconnecting the jumper cable, successfully re-park the vehicle you used to jump-start.
Allow the other cable to continue running for some time, like half an hour.
Conclusion
The jumper cables will be the best solution if your car can’t start. They will help you get up your car in a few minutes. However, it would help if you were quite keen when handling the jumper cables.
You need to know how to connect and disconnect the jumper cable in handling. Any small mistake can surely cost some of your car’s technical parts, such as the computer.


![Fan Expo Chicago [Convention], Donald E. Stephens Convention Center, 16 Aug What You Need to Know](https://www.thefreemanonline.org/wp-content/uploads/2024/09/Fan-Expo-Chicago-Convention-Donald-E.-Stephens-Convention-Center-16-Aug-What-You-Need-to-Know-74x55.jpg)
![Error [err_http_headers_sent] Cannot Set Headers After They Are Sent to the Client How to Fix](https://www.thefreemanonline.org/wp-content/uploads/2024/09/Error-err_http_headers_sent-Cannot-Set-Headers-After-They-Are-Sent-to-the-Client-How-to-Fix--74x55.jpg)
