


If you’re looking to add a rustic touch to your home decor, pallet flooring can be an excellent choice. Not only is it affordable and eco-friendly, but it can also give your space a unique and charming look. Plus, with the right tools and some basic DIY skills, you can easily install pallet flooring on your own. In this guide, we’ll take you through the step-by-step process of installing pallet flooring, from sourcing the pallets to finishing the final coat. Whether you’re a seasoned DIY enthusiast or a complete beginner, this guide will provide you with all the information you need to create a stunning pallet floor that is both fashionable and functional. So, let’s get started and transform your space into a cozy and inviting haven!
How To Install Pallet Flooring?
- Source your pallets: Look for pallets that are in good condition, with minimal cracks or damage.
- Prepare the subfloor: Make sure the subfloor is clean and level before starting the installation process.
- Sand the pallets: Sand down any rough edges or splinters on the pallets to create a smooth surface.
- Cut the pallets to size: Use a saw to cut the pallets to fit your space, leaving a small gap between each board for expansion.
- Lay out the first row: Start at one end of the room and lay out your first row of pallet boards, ensuring they are straight and level.
- Nail or screw down the boards: Secure each board in place with nails or screws, making sure they are flush with one another.
- Continue laying out rows: Continue laying out rows of boards until you reach the other end of the room, staggering each row for a more natural look.
- Cut around obstacles: When you come across obstacles such as pipes or corners, use a jigsaw or handsaw to cut the pallet boards to fit around them.
- Finish the floor: Once all the boards are in place, sand the entire floor to create a smooth surface. Then, apply a finish of your choice, such as stain or sealant, to protect and enhance the wood.
- Maintain your pallet floor: To keep your pallet flooring looking its best, sweep and vacuum regularly and wipe up spills immediately. Avoid using harsh chemicals or abrasive cleaners, as they can damage the wood. Instead, use a damp mop and a mild cleaner specifically designed for wood floors.
By following these steps, you can create beautiful and unique pallet flooring that will add warmth and character to any space. Not only is it an eco-friendly option, but it’s also affordable and easy to install with the right tools and some basic DIY skills.
Advantages Of Using Pallets For Flooring
Are you tired of traditional flooring options that require constant maintenance and upkeep? Look no further than pallets for your next flooring project. That’s right, those wooden platforms commonly used for shipping and storage can also be repurposed into a stunning and practical flooring solution.
One of the biggest advantages of using pallets for flooring is their durability.
Pallets are designed to withstand the wear and tear of transportation and can handle heavy loads, making them a sturdy choice for flooring. Additionally, pallets are easy to replace if needed, allowing for quick and cost-effective repairs.
Another benefit of using pallets for flooring is their eco-friendliness. By repurposing pallets, you are reducing waste and giving new life to materials that would otherwise be discarded. Pallets are also made from sustainably sourced wood, making them a renewable resource.
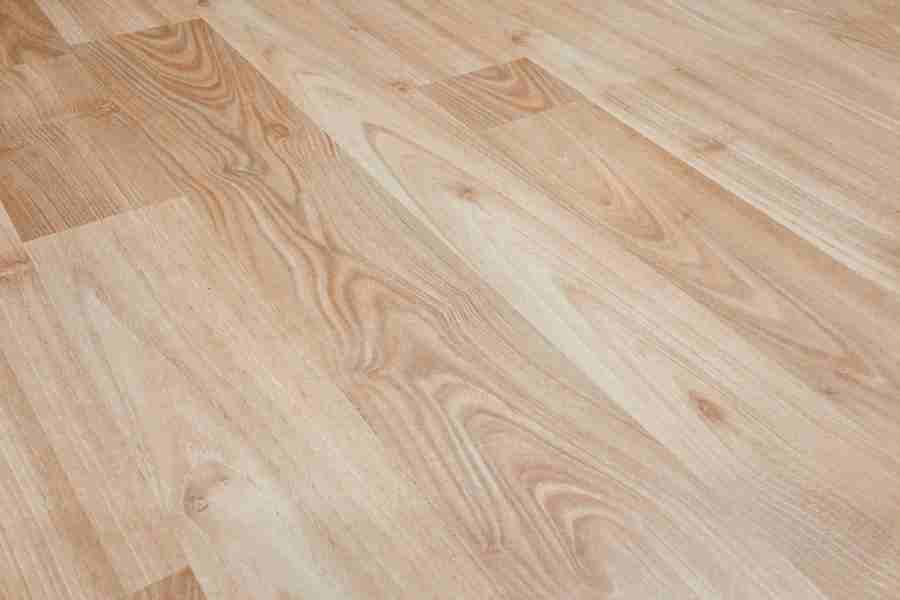
Pallets also offer a unique and rustic aesthetic that can add character and charm to any space. The natural wood grain and texture of pallets create a warm and inviting atmosphere, perfect for homes and businesses alike.
Lastly, using pallets for flooring can be a budget-friendly option. Pallets are often available for free or at a low cost, making them an affordable alternative to traditional flooring materials.
Preparation Before Installation
- First and foremost, it’s important to inspect the pallets you plan to use for flooring. Look for any signs of damage or rot, as these can compromise the integrity of your flooring.
- Once you have selected your pallets, it’s time to clean them thoroughly. Use a wire brush or sandpaper to remove any dirt, debris, or splinters from the wood.
- Measure the area where you plan to install your pallet flooring and calculate how many pallets you will need. It’s always a good idea to purchase a few extra pallets in case some are damaged during installation.
- Before installation, it’s recommended that you acclimate your pallets to the environment where they will be installed. This means leaving them in the space for a few days so they can adjust to the temperature and humidity levels.
- Finally, gather all necessary tools and materials for installation, including a saw, hammer or nail gun, screws or nails, adhesive (if desired), and a level. Make sure you have all the necessary safety equipment, such as gloves and eye protection, before beginning the installation process.
Materials Needed For Pallet Flooring Installation
Now that you’ve decided to use pallets for your flooring project, it’s important to gather the necessary materials before you start. Here’s a list of what you’ll need:
- Pallets – The number of pallets needed will depend on the size of the space you’re covering. Make sure to choose pallets that are in good condition and free from rot or pests.
- Pry bar – This will be used to remove any nails or staples from the pallets.
- Circular saw – You’ll need this tool to cut the pallets to size.
- Measuring tape – To ensure accurate measurements when cutting the pallets.
- Hammer and nails – These will be used to secure the pallet pieces together.
- Floor sander – To smooth out any rough edges and give your flooring a finished look.
- Stain or sealant – This is optional, but it can help protect your flooring from wear and tear and give it a polished appearance.
- Safety equipment – Don’t forget to wear protective gear such as gloves, safety glasses, and a dust mask when working with pallets and power tools.
Using pallets for flooring can be a fun and rewarding DIY project. With the right tools and materials, you can create a unique and eco-friendly flooring solution that’s both practical and stylish. Just remember to take your time, be safe, and enjoy the process!
Step-By-Step Guide On How To Install Pallet Flooring
Now that you have all your materials, it’s time to start installing your pallet flooring. Here’s a step-by-step guide on how to do it:
Step 1: Prepare the space
Clear the area where you’ll be installing the pallet flooring. Remove any old flooring or carpet, and make sure the surface is clean and level. The first step is to clear out the area where you want to put it. Get rid of any old flooring or carpet, and make sure the surface is clean and level. This will ensure that the pallets lay flat and create a sturdy base for your new floor. With a little bit of elbow grease and some determination, you’ll have a beautiful new floor in no time!
Step 2: Measure and cut the pallets
Using your measuring tape, measure the length and width of the space where you’ll be installing the pallet flooring. Then, using your circular saw, cut the pallets to size based on your measurements. Be sure to cut off any rough or damaged edges. This is going to be so much fun! Get ready to transform your space with pallet flooring. Grab your measuring tape and circular saw, because it’s time to get started. Measure the area where you want to install the flooring, and then use the saw to cut the pallets to size.
Step 3: Arrange the pallets
Lay out the pallet pieces in a pattern that you like. You can choose to lay them out in a straight pattern or create a more intricate design by alternating colors or sizes. The first step is to lay out the pallet pieces in a pattern that speaks to you. You have complete creative control here – whether you want a simple straight pattern or a complex alternating design, it’s entirely up to you!
Step 4: Secure the pallets together
Using your hammer and nails, secure the pallet pieces together. Hammer nails into each corner of each piece to ensure they are securely fastened together. Grab your trusty hammer and nails, because we’re about to make magic! The first step is to secure the pallet pieces together. Don’t worry if you’re not a pro at this yet – it’s easy and fun! Just hammer nails into each corner of each piece, making sure they’re securely fastened together.
Step 5: Sand down any rough edges
Using a floor sander, sand down any rough edges on your newly installed flooring. This will give it a smooth finish and make it safer to walk on. Now it’s time to take them to the next level by using a floor sander. This is where the real magic happens – you’ll be able to smooth out any rough edges and give your floors the perfect finish they deserve. Not only will it look amazing, but it’ll also make your floors safer to walk on.
Conclusion
Installing pallet flooring is a fun and creative way to transform your space. With just a few tools and some pallets, you can create a unique and beautiful floor that is both sustainable and cost-effective. By following these steps, you’ll be able to create a stunning floor that will be the envy of all your friends and family.


